Thursday, August 25, 2011

Another naptime masterpiece- taco casserole

So BBQ chicken last night left alot of leftovers (I always cook extra meat because it is simple to remake into a new meal.. might as well do the "hard" cooking once)... So I made one of my absolute favorites!


TACO CASSEROLE!

ingredients:


taco seasoning (I will show you my homemade recipe but you can use the packet kind too)
2 cans of enchilada sauce (however hot your family likes)
1 can of diced tomatoes (my fav are the fire roasted but my pantry was out)
1 can of corn drained and rinsed
1 can of black beans drained and rinsed
1 whole chicken (or about 1 lb and a half chicken breast) cooked and shredded
4 large tortillas
a full cup of crushed tortilla chips, crushed taco shells or corn chips
1 pkg of mexican cheese
1 cup cooked rice


Go ahead and cook your rice.. you can use plain white rice or even use some spanish rice


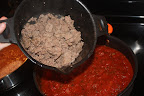
While the rice is cooking warm your chicken (or cook it) in a skillet with a touch of olive oil


give the chicken a minute to warm and add your can of diced tomatoes


add one of the cans of enchilada sauce


add about a tbsp of your homemade (or one whole packet) of taco seasoning---- taco seasoning tutorial at the end..


let this cook through and the flavors marry
drain and rinse your corn and black beans


add to a saucepan and cover with water and let them simmer


crush your chips into bite sized pieces.. I like to use a ziplock baggies to keep the mess contained.. these are just plain taco shells I got for free a while ago and was trying to find a use for them.. I had to use about half of the pkg to get enough to cover the casserole


form your assembly line..

add each layer.. spray pan, add 2 of the large tortillas on the bottom of the casserole dish, add half of the cooked rice, add about half of the meat mixture, half of the corn/blackbeans, add 1/3 of cheese and then cover with crushed chips (or just use two more tortillas)


Repeat the layers (without the crushed chips at the top.. instead use the remaining two tortillas)


pour the last can of enchilada sauce over the tortilla layer


top with cheese


cover with foil and place on a cookie sheet to protect your oven from spillage


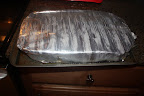
bake at 350 for about 45 minutes.. the final 5-10 minutes take foil off to melt/brown cheese

my favorite is to serve this with sour cream and fresh lettuce for some crunch! ohhh and maybe some of those left over chips to scoop


Enjoy :)))

My taco seasoning (this is just my adapted version.. please feel free to simply use this as a base for your own and you can just go ahead and make large amounts of this and keep it in a container for future use.. I do.. it stays good for about a month


2 tbsp chili powder
1/2 tsp garlic powder
1/2 tsp onion powder
1/2 tsp crushed red pepper flakes (this will add more heat if you increase amount)
1/2 tsp dried oregano
1 tsp paprika (this will increase "mexican" taste sorta)
1 tbsp ground cumin
2 tsp sea salt (this you can decrease a little because you have LOTS of salt in your beans and salt even with rinsing)
2 tsp black pepper

mix together :)


Just a tid bit of extra info.. if you want to expand this recipe to make more.. 3 tsp = 1 tbsp.. I had to look that one up!


Sunday, August 21, 2011

Mashed Potatoes.. a perfect side!

So I used to be the wife that just threw some water butter and salt in a pot and stirred in some flaky potato stuff and there was mashed potatoes... My husband very nicely told me that he didn't like them, after about two years of me making them!!!! So I was on the hunt for a good mashed potato recipe.. not really necessarily a recipe but more a concoction that we both agreed on. See I was used to "whipped" potatoes and he was used to chunky potatoes.... he was used to go old full of butter etc.. I was used to some milk salt and pepper made by my wonderful father..

So after a billion times of trying I have figured out my tips...Ps there is a serious warning along with this recipe. I am NOT a good measurererererer (yea got carried away with the "er"'s)... I usually add to taste.. if you want it creamer add more cream cheese or milk, if you want it less add more sour cream if you want more salt pepper etc.. add more... So these are just my jest on this batch.. take mine and build yours please :)

Ingredients ::::

5 lb bag of russet potatoes, or yukon.. any others tend to get too watery or just not quite right
4 oz cream cheese (I usually use the less fat kind but this is all I had) softened
1 ish stick of butter... softened
salt
pepper
garlic powder
light sour cream (about 1/2 cup or so)
milk if needed


So go ahead and prepare your potatoes... wash wash and wash some more.. I feel though that you are going to peel them anyway so I tend to rinse and scrub a bit then after I peel rinse again...


Go ahead and put cold water in your pot... Now here is a tip and I will explain it. ALWAYS start your potatoes in cold water.. this allows them to cook through evenly, if you put potatoes in hot water the outside of the piece of potato will cook first and start to fall apart. I use this technique with baking potatoes too.. start baking in a cold oven!

Ok so here is the thing.. as a one man show here (aka cook, photographer, writer, maid, mom ahh the list goes on) shooting myself peeling potatoes etc is super hard! SO you can use your imagination! So peel away... I would love an assistant in the kitchen. Peeling potatoes is probably my least favorite job ever.. right next to peeling carrots! Jaxon wanted to help but a 22 month old with a peeler?? Um NO

Now another quick tip.. see this black nasty looking spot.. yea you don't want those.. so keep on peeling till they are gone.. if not, cut that area away completely!

See this little brown spots.. yea that is some unpeeled "skin".. I kinda like that.. adds some nutrients (aka dirt... dirt ever hurt anyone.. I grew up eating dirt and probably cat hair and dog hair right mom? I turned out just fine) but you do rinse and rinse again so leave some skin!

So cut all your potatoes in similar size pieces, the smaller the faster they cook, the bigger the longer just make sure they are all relatively similar in size so they cook the same amount.. Also I peel and dice as I go. usually two potatoes at a time, if you leave them out of the water too long they discolor and oxidize so keep them suckers in water after peeling!


Put on the stove on medium high at a boil for about thirty minutes for good chunky potato sizes! Keep an eye out on them thought checking with your fork!


(see that fry pan.. yeah heaven.. FRIED OKRA! ahhh kept my in the kitchen to watch the potatoes)

Ok so the fork test.... The way this work is scoop out a piece of potato.... put a fork in it.. if there is any resistance let them cook a little longer.. if it slides right in then you are good.. now if it goes through and the whole thing falls apart. well you have done it now! still make the potatoes but you might need to add some real cheese as a bonding agent!


Drain your potatoes and let them sit for a second to drain the water away..


Now this is an interesting part. As I was researching and experimenting...I found that if you put the potatoes back on the hot eye as you are mixing in the ingredients the "water" left in the potatoes will steam up and evaporate so you don't get stuck with watery potatoes.. guess what it works! So place them suckers in the pot and that pot on there and add your butter and cream cheese and mash with your masher.. if you don't have a masher.. um you can use a sturdy wisk but really you need a masher!


mash a little then add your sour cream, salt, pepper and garlic powder... Now I am usually a stickler for fresh ingredients but nothing would gross me out more then biting down on a hunk of garlic in my potatoes.. so the powder is perfect in there!


Mix all of this together .. Make sure you taste it.. add whatever else you want to taste. Butter always is better but add sparingly and taste as you add. I always make a ton for a reason.. tasting is SO important when it comes to mashed potatoes.. and always remember.. you can always add but never take away so careful with your ingredients!


Now you can at this point add some pieces of butter on top.. place it in a 350 degree oven for a few minutes and let it all merry together but.. I had an awaiting family and friends :)


Serve some with yummy steak, okra, green beans and a side of the cutest little picky eater ever.. All this yumminess and he would much rather eat crackers and fruit!

Enjoy! 

Oh and an extra tid bit for those who plan their meals like me. 5 lbs of potatoes makes enough mashed potatoes for an ARMY.... SO go ahead and make an entire batch and then go ahead and look into making some shepherds pie with the left over mashed potatoes and green beans :)


Friday, August 12, 2011

Another nap time masterpiece! Baked Ziti---- TWO WAYS!

Ok so in this house we have another disagreement. My husband has all of a sudden professed he is not a fan of alfredo anything... And it just so happens that my favorite baked ziti is my white sauce ziti... So when I make it now I just make two different sauces :)

Here are your ingredients:::::

1 box ziti
1 jar of red pasta sauce (your favorite is fine)
1 jar of "white" pasta sauce (your favorite.. I personally love vodka sauce but they were out at the store)
mozzarella cheese (Your discretion to how much you want to use)
parm cheese (same... how ever much you like)
basil (I LOVE fresh)
oregano
parsley
salt
pepper
olive oil
1 lb of either lean hamburger or ground turkey
2 cans of petite diced tomatoes
minced garlic
2 small onions

Begin by browning your meat. I have a neat pampered chef microwave thing that I cook my meat in but you can just simply brown it in a pan too.


mince your onion... see how much I use that mini food processor.. I am telling you.. the best $10 ever SPENT!


warm about a teaspoon of olive oil in each pan. You will need two pans because you will be making two different sauces. If you want to do just one sauce.. just use two jars of the same pasta sauce. and only do one medium onion.

Drop in one minced onion per pan. sprinkle in a dash of salt and pepper per pan.


cook till translucent over medium high heat. Add a small spoon of minced garlic to each pan. Let cook for just a moment.


Add a palmful of each spice.. I am HORRIBLE at getting measurements... just a palmful = about a tablespoon.


Add 1 can of petite tomatoes per pan.


Mix all together... SO GOOD!!! I could just add some angel hair pasta to this and eat it this way too :))

Then add your jars of pasta sauce... each to each pan..... YUMMY!


Drain your meat off and add 1/2 lb to each pan. I do not like alot of meat in my ziti but you can add as much as you would like. At this point I LOVE to add in grilled zucchini and squash but a certain husband of mine does not like them but they are SO good in this too! (to grill each just slice long ways and add olive oil salt and pepper and grill over medium heat for a few minutes till slightly soft but not cooked thru then take off grill and cube and add to the sauce)

let these sauces simmer for a little bit to let the yumminess marry together!

While simmering go ahead and get your pasta water ready...


Bring to a boil and add salt.. this is the ONLY time to you favor your pasta so salt that sucker up! Add pasta

allow to cook for 8 minutes.. the pasta will continue to cook when you bake it in the oven so you want it al dente!

Drain reserving a cup of startchy pasta water

Now comes the fun time!  Assembly! Reserve 1 cup of sauce per pan. add 1/2 of pasta to one pan and 1/2 to the other... add 1/2 of pasta water to one and one to the other!


Mix together  well :)

Add 1/2 of mixture to a casserole dish. top with a dash of parm cheese and moz cheese


add remaining pasta and top with reserved sauce, moz and parm cheeses...


Do this with the other sauce pasta mixture too in a sep dish!

There now you have "white" ziti and "red" ziti!

At this point I simply let cool a little, covered with foil and placed in the fridge until about 30 minutes before supper time.

PLace both dishes in the oven at 375 for about 30 minutes, uncover foil the final 5 minutes to brown the cheesy yummy top!


Serve with salad and fresh french bread :)))) Enjoy.. I know we did!